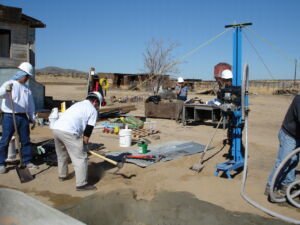
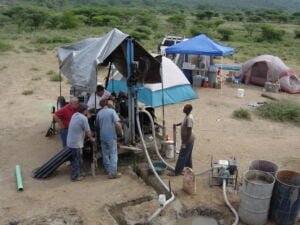
A successful international water well drilling project starts with safety. The right preparation, situational awareness, regular cleaning and maintenance are pivotal to succeeding at the important job of bringing water to developing countries.
To make sure you’re achieving safety standards with your drilling rig equipment, check out these tips.
1. Dig Deeper
Before you dig into soil, dig into educational resources for safe preparation guidelines to help with traveling and adapting to a new environment. Check partner charity organizations and government websites for general travel information and the country’s regulations. Talk with experienced organizations, read blogs and ask questions to gain familiarity so you feel comfortable enough to safely complete your project.
2. Train Before Departure
 How do you drill water wells safely? Start by familiarizing yourself with drill equipment and ensure proper handling procedures by using training resources. View videos on portable water well drill rig setup and equipment operation. You may also want to attend a training program from reputable manufacturers, such as Lone Star Drills, or through charity organizations.
3. Pack for Protection
Bring comfortable clothing but avoid anything loose that could get caught in moving parts. Pack work boots to properly cover feet and hard hats to protect against head injuries. Depending on the environment, sunscreen or a portable canopy offers protection against potentially harmful ultraviolet rays.
4. Delegate to Avoid Confusion
Assign each team member a role and learn about drill team member roles before departure. Predeparture training minimizes the risk of injury by reducing confusion about individual responsibilities and helping each person on the drill team keep the area clear of hazards. This keeps the operation running smoothly.
5. Check Equipment
Prevent untimely repairs or injuries by dedicating a few minutes to examine and service equipment before you drill. Make a habit of checking for proper lubrication to prolong the drill’s life. These guidelines walk you through the process.
6. Safely Set Up Site
 Begin safe setup procedures by roping off the jobsite to ensure bystanders won’t wander through the drill site. Then, organize tools on dry ground. Place the portable water well drill rig in a shaded area, if possible, and properly anchor the rig on stable ground.
7. Open Eyes and Ears
Prevent safety issues with keen attention to the environment and thorough understanding of the task. Make sure to check equipment daily for proper lubrication. This prolongs the drill’s life and keeps the operation running smoothly. Be alert for any hazards or sounds indicating a potential concern, such as screeching equipment. Quickly isolate any issues and reference the operators’ manual and this video of troubleshooting tips. Use our water well drilling kit for quick repairs and adjustments.
8. Commit to Cleaning Before Completion
Rusty pipes and drill bits contribute to premature equipment wear; they can cause worksite hazards, such as infection to preexisting cuts from injury. Wash muddy drill pipes to avoid slippery handling and prevent rust. A trailer mounted water well rig offers enhanced portability and built in drill racks allow safe storage for pipe. Be sure to replace the thread protector caps before storing pipe in a trailer. To protect drill bits, remove soil and then coat them with oil before storing. Box threads should be cleaned of dirt and grease with a wire brush. Any potential hazards, such as drilling debris, should be removed from the area to avoid injury. Properly caring for equipment and cleaning the drill site saves considerable time and ensures a safe start for the next drill team.Reference the operators’ manual for equipment cleaning guidelines.
Following these basic guidelines to protect your team from injuries and prevent costly maintenance. For any additional questions, view the operators’ manual or contact us.